Build a Checkout Options Set
In this article, we’ll do a step by step walk through of how to build a Checkout Options set.
Step 1: Getting Started.
Go to Giftship –> Checkout Options from your Shopify dashboard:

From there, click New Option Set.
This will bring you to the Checkout Options builder.
Step 2: Selecting your Blocks
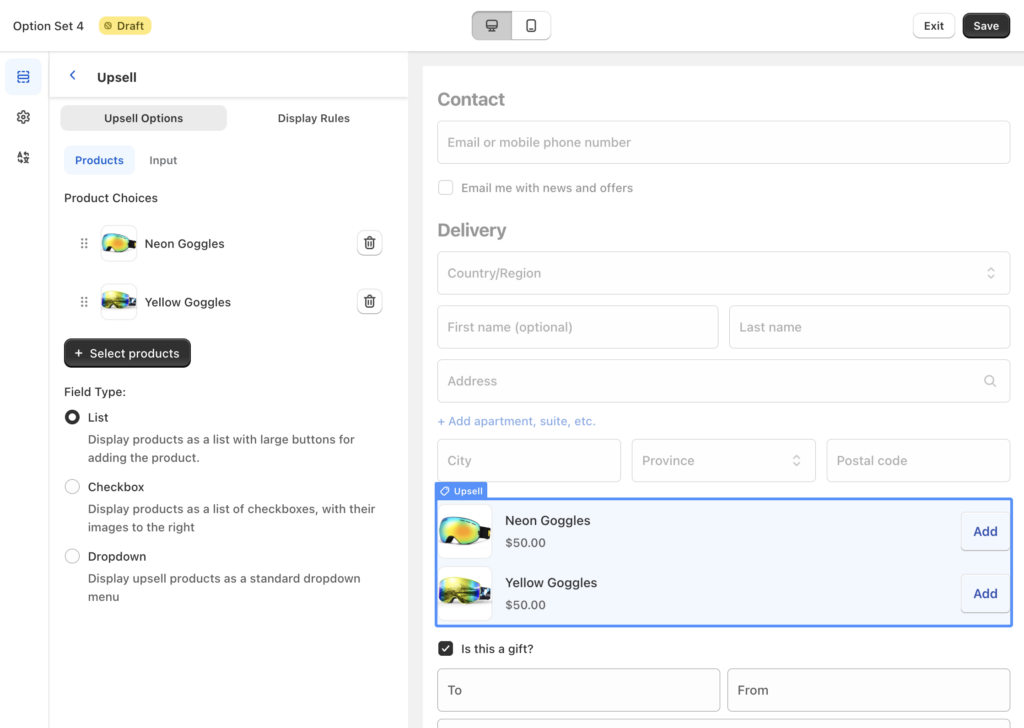
Within the builder, you’ll see in the left hand column the Checkout Option Builder, and a big preview screen on the right, with desktop and mobile view options.
Click on Add Block on the left to choose your first Checkout Option Block:
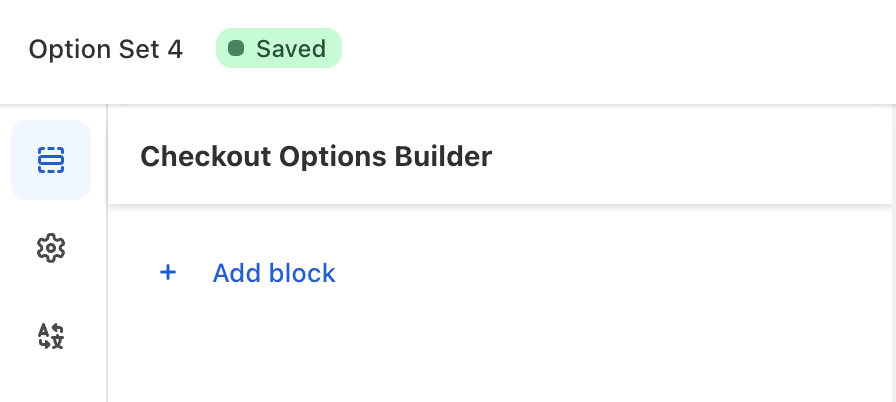
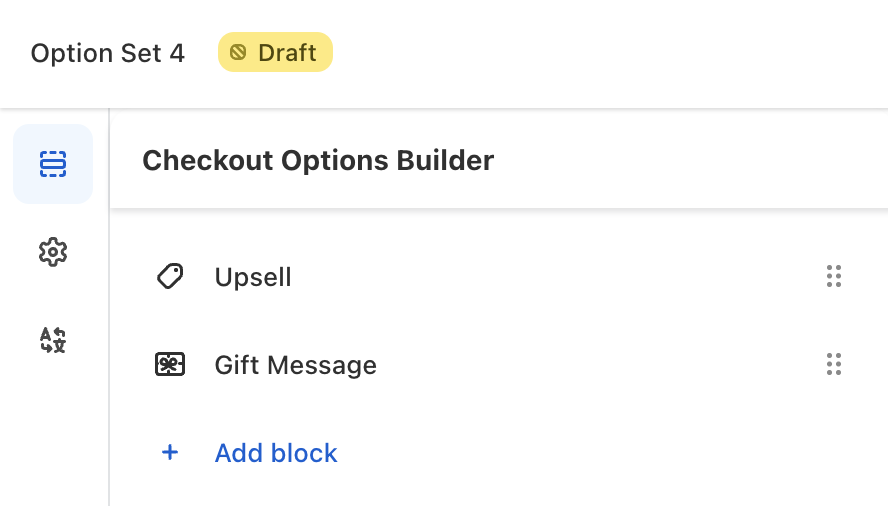
From here, choose your Blocks. Let’s say that you want to add both an Upsell and a Gift Message Option to your cart. Once selected, they’ll display within a list. You can re-order them anytime.
Step 3: Configuring your individual blocks
To edit the blocks themselves, click on the block and you’ll see relevant options for each style of block.
Let’s say you want to edit your Upsell block:
First, under the Upsell Options –> Products tab, you can choose your Upsell Field Type. Choose which products you want to offer as an upsell, and add name and label attributes to the Option Block. And remember to always save updates along the way.
While building your Block, you’ll see the Preview section update in real time to give you an impression of how this will look on your storefront:
Step 4: Adding in Display Logic
There are two type of Display Logic – this can be done on an individual Block level via Display Rules, or on the entire option set via Display Settings.
First, let’s go over the Block level Display Rules.
Click on an individual Block, for example Gift Message. And at the top of the configuration column you will see a Display Rules tab. Click this.
Next you will see that you can add conditional logic based on Display option and Conditions.
For the Display Option, you can choose whether all, or any, of the Conditions you set up must be met.
For Conditions, you can stack as many of these as you like.
For simplicity, let’s say we want to only display the Gift Message option if an Upsell has been selected on the storefront by the customer. In this case, we would set up the Condition to say ski-goggle is selected.
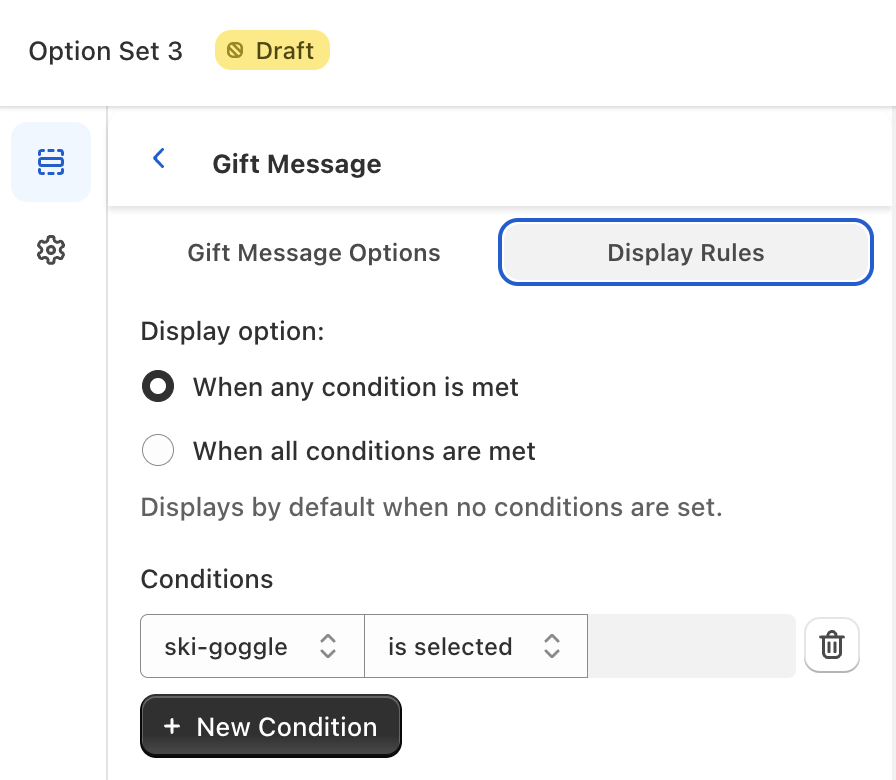
Now the Gift Message block will only display on the storefront if the customer has added an Upsell.
Next, let’s go over Display Settings – which apply to the entire Checkout Option set.
The Display Settings option within Checkout Options configuration can be accessed by selecting the Edit Icon in the left-hand column.
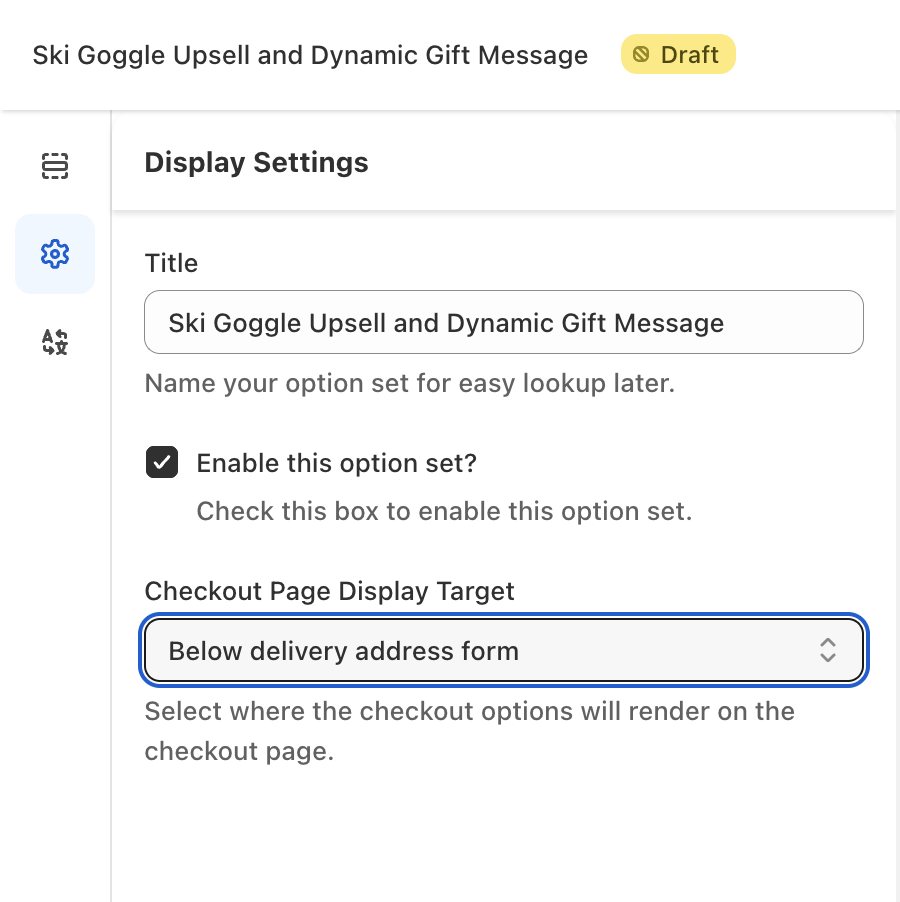
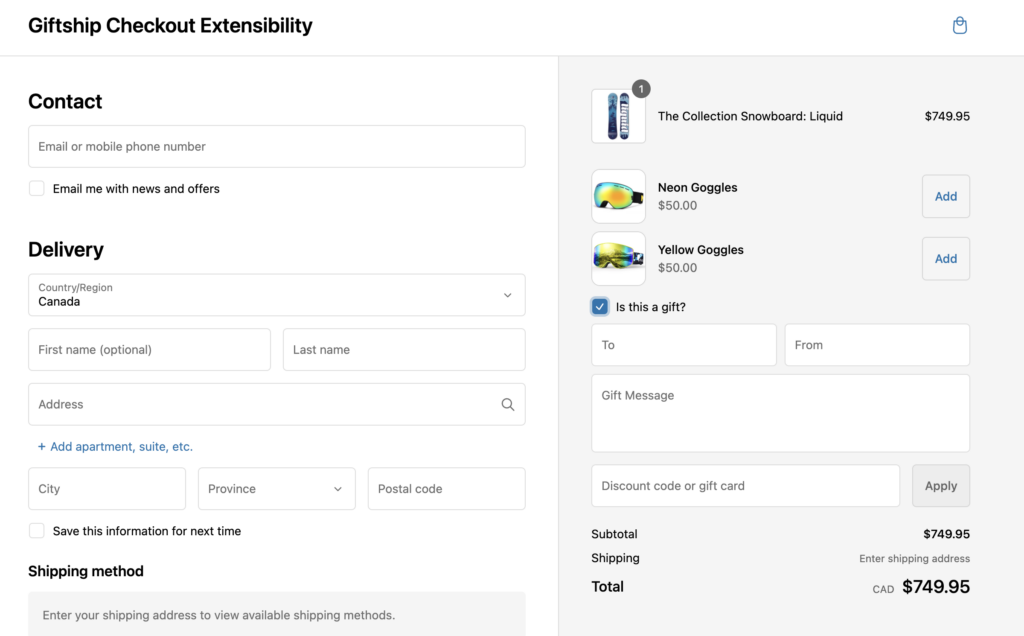
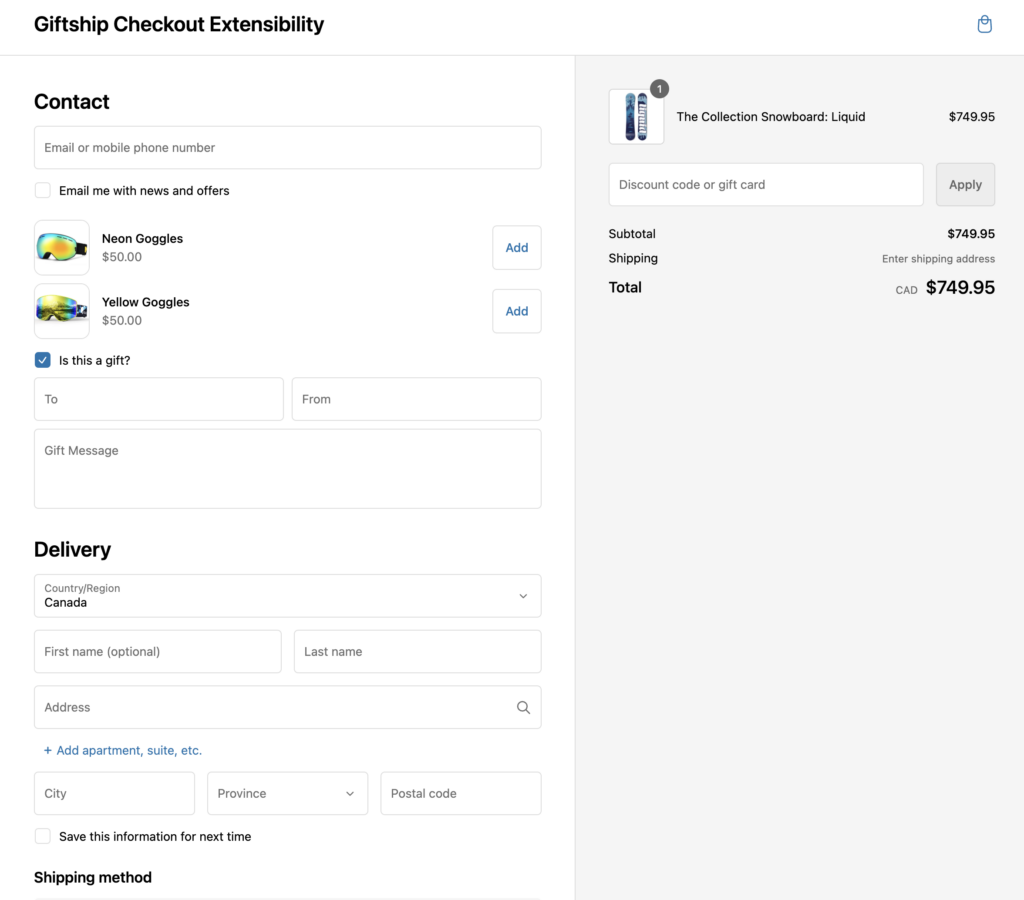
Here you can Rename the Option set, Choose whether to Enable the Option set, and Choose whether you would like the Option Set to appear on your Checkout. There are 3 locations that it can display in on your Checkout:
- Above Discount Form
- Below Contact Form
- Below Delivery Address Form
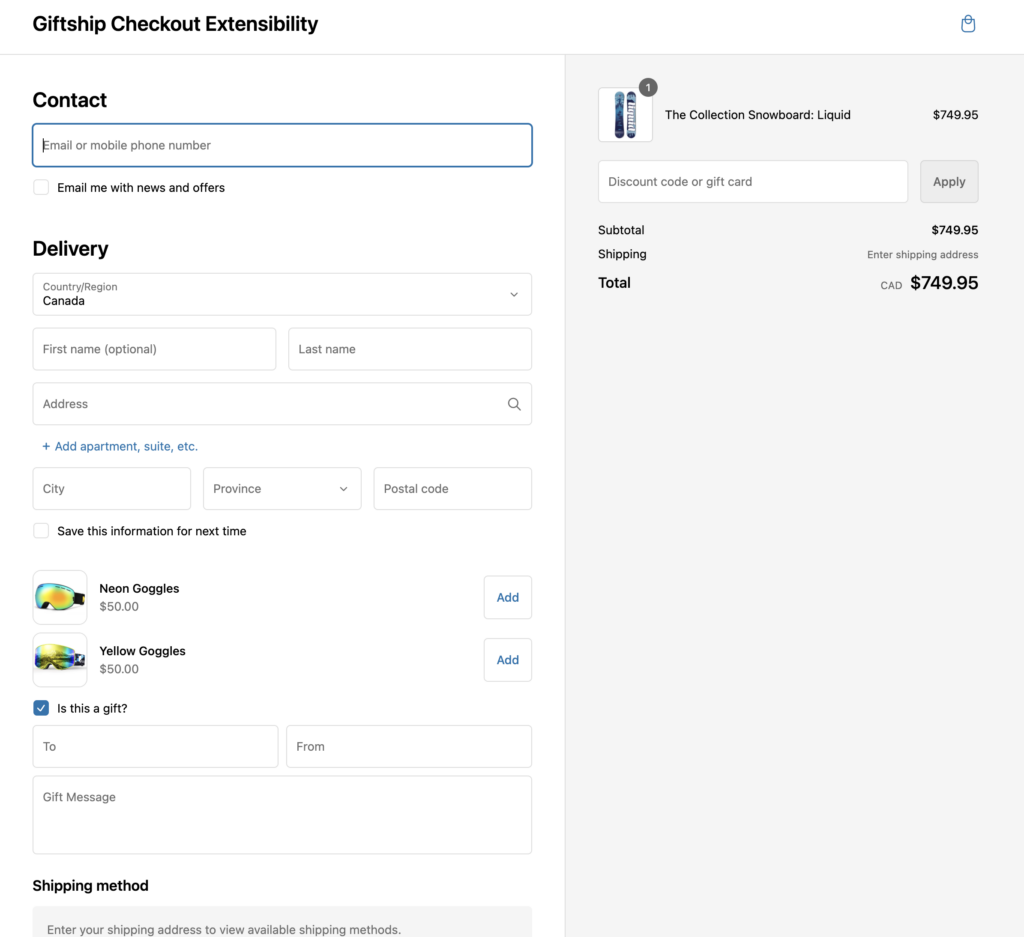
If you want different Blocks to display in different locations on the Checkout, then you would create multiple Checkout Option Sets and point them to different locations on the Checkout page.
A helpful tip is to rename different Option sets so that you can quickly find what you need within the Giftship dashboard.
As ever, if you need any help with configuring this tool, please don’t hesitate to get in touch with us at support@gist-apps.com